

Craft Tutorial: Mini School Bag for First Graders
- Manuela Albani
- Jun 1, 2025
- 2 min read

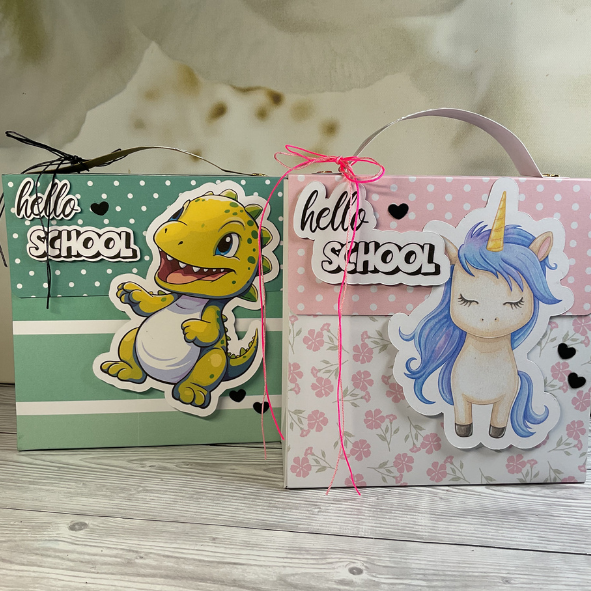
A creative gift idea for the first day of schoolThis handmade mini school bag is a lovely alternative to the traditional school cone. Perfect for packing small surprises like sweets, pens, or lucky charms in a stylish way.
🧰 Materials Needed:
4 sheets of A4 cardstock
Ruler, pencil, bone folder
Scissors and craft knife
Liquid glue (double-sided tape optional)
Ribbon (2 cm wide, approx. 2 × 25 cm)
2 brads or star-shaped split pins
2 small magnets (for the closure)
Hole punch
Corner rounder (optional)
Decorative items of your choice (stickers, letters, paper embellishments, etc.)
📏 Cutting List & Measurements:
Back piece:30 × 15 cmScore at 6.5 cm / 11.5 cm / 26.5 cm
Front piece:26 × 15 cmScore at 6 cm / 21 cm
Bottom:6 × 15 cm
Inner support:15 × 15 cm
Side pieces (2x):20 × 10 cmScore 2 cm from both long sides and 5 cm from one short side
✂️ Shaping the Side Pieces:
Find the center of the 6 cm wide section (between the 2 cm fold lines) – mark at 3 cm
Draw a line from the center point to the bottom left corner of the 5 cm folded edge
Repeat on the right side (to bottom right corner)
Cut away the resulting rectangles
Lightly angle the upper edges (optional)
🧵 Prepare Strap Openings (Back Part):
Measure 1 cm from the top and bottom edge
From both left and right edges, measure 3 cm inward – mark points
From each point, measure 1 cm to the left and right → this creates a 2 cm wide slit
Cut or punch the slits
Adjust width to match your ribbon size
🪡 Straps & Handle:
Cut 2 ribbons, each 25 cm long
Cut cardstock for the handle: 3 × 15 cm
Score 1.5 cm from each side lengthwise
Punch a hole at each end
Round the corners (optional)
🧲 Attach Magnets for Closure:
Mark the magnet positions on the front flap (best at the 6 cm fold line) and matching spots on the front panel
Attach magnets using glue or double-sided tape
Ensure they align perfectly to create a secure closure
🧱 Assembly Instructions:
Glue the side parts to the front and back panels
Attach the bottom piece to the front and back
Insert the inner support piece for stability
Thread ribbons through the prepared slits and fix inside
Attach handle using brads or split pins
Fold the front flap down – magnets will secure the bag shut
🎀 Decoration Tips:
Add names or school-themed designs
Use stickers, washi tape, or die-cuts
Add small charms or good luck tokens
📌 Important Notes:
Ideal as a gift for the first day of school
Perfect for small surprises
Can be reused for storage later
⚠️ Not suitable for children under 3 years of age due to small parts and magnets
📌 Here’s the direct link to the tutorial:


.png)
Comments