

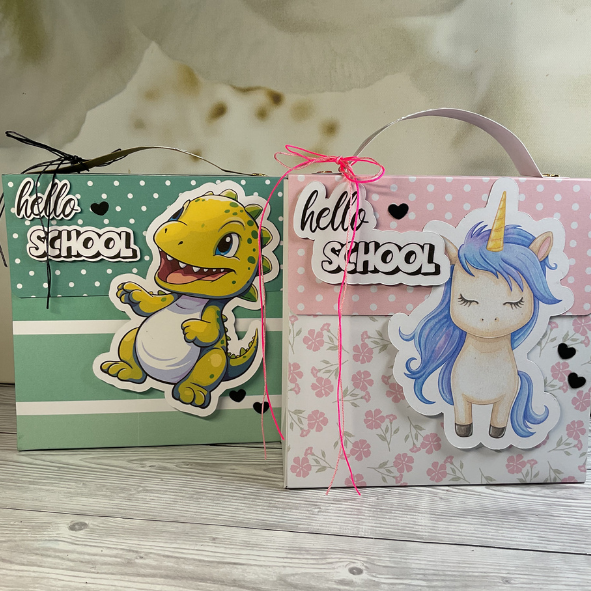
Card Flipbook fai da te per il primo giorno di scuola
- Manuela Albani
- 19 giu 2025
- Tempo di lettura: 1 min


Istruzioni per realizzare un Flipbook
Struttura di base:
Cartoncino 11 x 21 cm– Cordonare sul lato lungo a 1,8 cm e 2,5 cm– Ruotare il foglio e cordonare nuovamente a 1,8 cm e 2,5 cm
Secondo pezzo di cartoncino: 10,5 x 15,8 cm– Cordonare sul lato lungo a 1 cm
Terzo pezzo di cartoncino: 11 x 21 cm– Cordonare sul lato lungo a 12 cm
Quarto pezzo di cartoncino: 11 x 13 cm– Cordonare sul lato lungo a 6,5 cm– Poi misurare 5 cm dall’alto (sul lato lungo) e tagliare in diagonale
Tasca interna: 6 x 17,8 cm– Cordonare su tre lati a 1 cm– Sul lato sinistro, misurare 2,7 cm verso il basso e tagliare in diagonale
Supporto: 5,5 x 2 cm– Cordonare a 0,6 cm e 2 cm– Poi tagliare lungo la linea di piegatura
Carta decorativa e decorazioni:
Carta decorativa: 10,7 x 15,7 cm
Ritagliare 3 tag (dimensioni a piacere)
4 angoli per foto: ciascuno 2 x 4,2 cm
Centro della tasca: misurare 2,2 cm (per l’apertura)
Mattature (Matting):
1 pezzo: 4,1 x 15,4 cm
1 pezzo: 9,2 x 15,5 cm
2 pezzi: 16,6 x 10,7 cm
2 pezzi: 8,7 x 10,7 cm
3 pezzi: 6,1 x 10,7 cm
1 pezzo: 4,7 x 9 cm
Guarda il video qui: https://youtu.be/Wb93bvO6ce8


Commenti